Saturday, August 29, 2020

Dutch Wonderland Sew Along Wrap Up

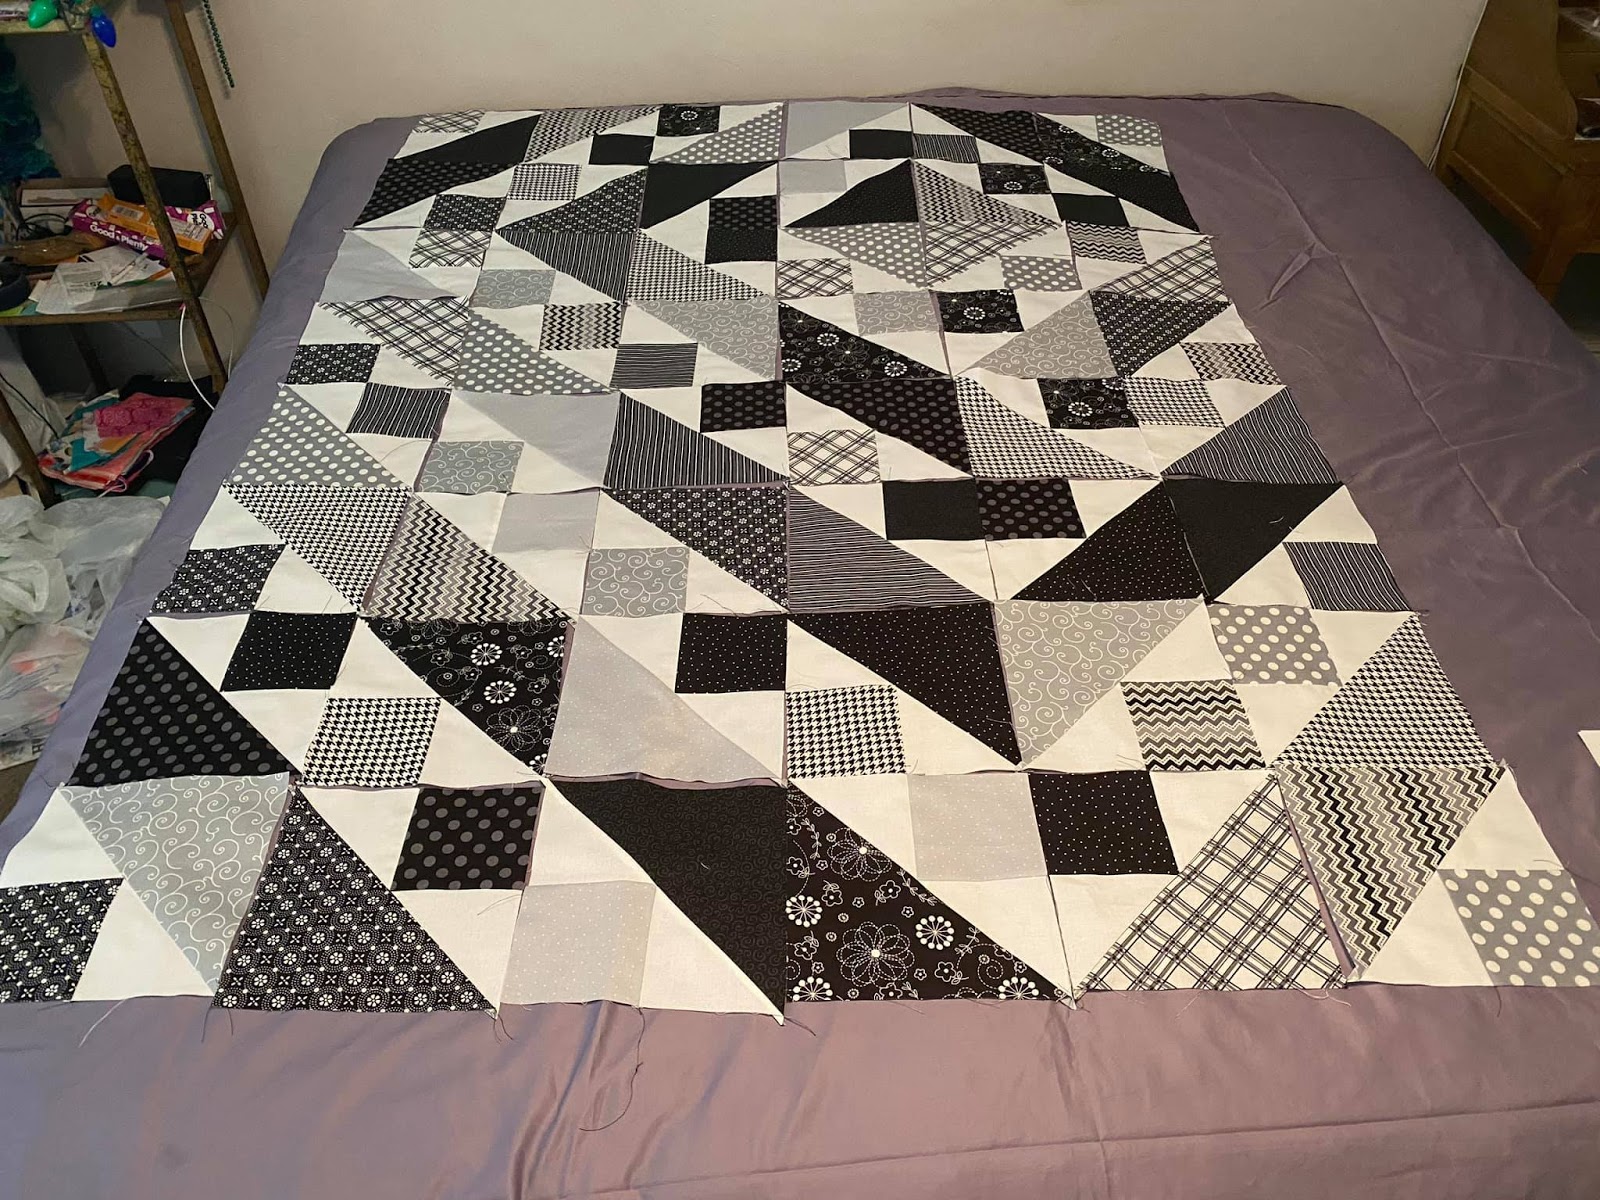
Ten weeks ago we decided to take on a big, new project - A sew-along for our 100" x 100" quilt, Dutch Wonderland Pattern. With a group of ambitious and talented quilters from our Facebook Group, Heidi's Quilting Help Desk, we embarked on a long yet rewarding adventure. 

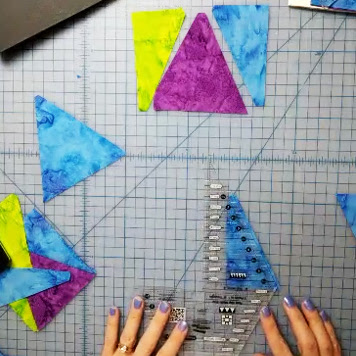
One of the things I love most about this quilt is that it's made up of a variety of different blocks. This gave our quilters the opportunity to make the entire quilt as is, or just follow along sporadically to brush up on specific block techniques. More advanced quilters were able to play with color matching, fabric patterns and the mixing and matching of different blocks. It made this a great project for improving block construction and challenging oneself, no matter how experienced a quilter you are.


I went live once a week to walk viewers through each new block, and the videos were then uploaded to YouTube several days later. I've found this to be a helpful format for quilters as it lets people follow along at their own pace, however they also have a chance to connect with me directly and ask questions as they come up. 

Now that this sew-along has been completed, I want to share some of the images I compiled throughout the process.


This next set of photos are courtesy of Glenda Lewis, one of our wonderful Facebook group members who completed this sew along with us!


Glenda's quilt turned out stunning, don't you think? 

Here are some images from Lois Schulstad (Center Block) and Barb Craig (Teal Blocks). Thank you to everyone who followed along over the ten weeks!


If you missed the sew-along but want to make your own Dutch Wonderland (or if you started and had to take a quick break!), we have videos for each week up on our YouTube channel. We'll walk you through every step of the quilt from start to finish and you can follow along on your own time. Here is the first video explaining the set up. Also check out our blog post about how to start this project here.


Make sure you join our Facebook group, Heidi's Quilting Help Desk, or follow us on Instagram @WhimsicalWorkshop to stay up to date with the details for our next sew-along and all of the other exciting news happening around the studio. 


Saturday, August 22, 2020

The Versatility of Triangle in a Square Blocks using Creative Grids 2-Peaks in 1 Ruler


Welcome back to our blog! Today I wanted to go more into depth on why I love to use Triangle in a Square blocks in so many of our quilt designs. Not only are these blocks easy to construct with the right tools, but they're incredibly versatile and can be used in so many different ways to create a ton of unique visuals. 

You can use this block to create an interesting border, you can add a small triangle with flip and sew, or you can even create the illusion of curved lines! There are a ton of possibilities just waiting for you to try them all out. 


My favorite way to create these units is with the Creative Grids 2-Peaks-in-1 ruler, which is available for purchase on our website www.TheWhimsicalWorkshop.com

If you haven't used this tool before, we have a video tutorial on our YouTube channel showing just how easy it is to create these units.


If you're looking for some inspiration, we've pulled a selection of patterns from our website that are great examples of how this block can look. Let us know in the comments which one you're most excited to try!


QUILT PATTERNS:

COMPASS OF COLOR: Here is an example of the basic triangle in a square block being used for the block points. It gives the block a modern and clean feel that compliments the bright tonal fabrics. Fabrics from Andover Fabrics.


JELLY BEAN BLAST II: In this quilt, the Triangle in a Square blocks are used for the border. These units are great when you don't want a solid colored border and they definitely add some flair. Fabrics from Benartex Fabrics.


PENCIL BOX: This quilt was made using strip sets from Black and Tan fabric, and then I used the 2-Peaks-in-1 ruler to cut the pencil tops. You can even change the black strip out for different fabrics to create colored pencils! This would be a great project for a classroom, art studio or playroom. Fabrics from Timeless Treasures.


FRESH CUT: In this quilt, I used the foreground print for the small triangles and the background for the large triangles. Then I flipped the triangle in a square units 180 degrees to create modern flower petals.  Fabrics from Maywood Studios.

FABRIC KIT: Make this project even easier by using a pre-made fabric kit! 


CRESTING WAVES: In this project, the Triangle in the Square units were used as the sashing strips to continue the movement of the snail trail block across the quilt top. Look at that curved wave illusion!  Fabrics from Anthology Fabrics.


BURST OF STARS: Here is an example of how adding a smaller triangle to the corners of the Triangle in a Square block can create an entirely unique new look. Fabrics From FreeSpirit Fabrics.


PRIMARY POP: In the project below, I used the smaller triangles from the ruler for the vertical columns. It gives the quilt a fresh modern feel.  Fabrics from Island Batiks.


ANTICIPATION: Pop quiz time! Can you find the small triangles from the 2-peaks-in-1 ruler in the presents? Just another fun example of how versatile these blocks truly are. Fabrics from Andover Fabrics.


I hope you've enjoyed this mini trunk show and been inspired by all of the fun, creative ways in which this block can be used to create one-of-a-kind quilts. I look forward to seeing all of the projects you create in the future with these units! Happy Quilting!


Saturday, August 15, 2020

Let's Get Organized - Tips for Your Sewing Room

Getting and staying organized in the studio can feel like a full time job some days. You want everything to have its place, but also be easily accessible at any moment and not get in the way. We all know how fast our sewing room space can turn from organized to pure chaos while working on a project. And who wants to take a break from all the fun creating just to clean up?

In our studio, it's imperative that the cutting table be clean before starting a new project since these are paid projects with tight deadlines. We treat the set up and clean up of a project as part of the project itself. Everything has to be finished and put away properly before moving on to something new. So, we thought we'd have Heidi come and share some of her best tips on how to stay organized in a new video series. These videos can be found on our YouTube channel, in a special playlist so you can watch them all the way through. Be sure to subscribe and get notified whenever we upload a new video.

To kick off this series, I was so excited to share a tour of our studio with you. This video covers how I set things up in the studio to make things easy to reach.  I feel very fortunate to have this space to work in, as my last studio was 10’ x 10’. I can tell you from experience that the smaller the space, the more organized you will need to be.   

Next in the series is a group of videos on how I recommend storing quilting supplies,  including rulers, pre-cuts, small notions and tools. If you are anything like me, you'll collect notions and tools for each project and then before you know it, you're swimming in extra tools.
The best piece of advice I can offer is to properly organize and store the tools you use infrequently. For tools that you reach for on a daily basis, it's more convenient to keep them out (and organized). What a great excuse to buy some colorful and fun containers for your room!


 Now we wouldn't be quilters if we didn't have a constantly growing stash of fabric. In these videos, I go over how to store fabric, quilting projects and UFO’s (unfinished Objects). I share my tips on how to sort through UFO’s and stay organized when you have more than one project going at a time. Because let's be real, who only does one project at a time?


Now that I've shared how I store my projects, I wanted to give you guys a video on how to stay organized when you start cutting a new project.

I always recommend cutting and labeling a project as if you are going to give it to someone else. If you put the project up for several months and then come back to finish it, you basically are someone else at this point and now you have to figure out what the old you did in the past. If you stay organized and label everything while cutting, it's so much easier to sort it all out at a later date.

Finally I want to share with you my general tips and tricks as a wrap out to our "Let's Get Organized" series


We hope you'll check out our entire series on Youtube and share these videos with your friends. And if you have any tips on staying organized, please share them with us! If you're someone who prefers to work in a less organized way, I hope you at least found this entertaining. You all never fail to impress and we're so glad you're part of our community. Happy Organizing!


Saturday, August 8, 2020

Down the Rabbit Hole Sew Along - Wrap Up


Back in May, we ran our very first Sew-Along with the members of our Facebook Group, "Heidi's Quilting Help Desk". We had so much fun virtually quilting alongside everyone as we went step by step through our Down the Rabbit Hole quilt pattern.

We are running another sew along currently with our Dutch Wonderland quilt, also in our Facebook group. It's 100" x 100", made up of 10 blocks and absolutely beautiful. You can make the whole quilt or just one of each block for a sampler quilt we will unveil at the end. Check out the YouTube Series to join us!

The best thing about our sew-alongs, apart from the projects we get to make together, is that you can follow along at your own pace. Videos are posted weekly in the Facebook group, and then again on our YouTube channel several days later. If you miss a week or start late you can still continue on your own timeline.

Down the Rabbit Hole featuring "Beginnings" from Michael Miller Fabrics

Here are the original quilts we made for Down The Rabbit Hole. We offer the pattern and kits of this  version in either Indigo or Black if you want to make one of these beauties following the YouTube Series!

Now that our first sew-along is over, we did want to show off some of the incredible Down the Rabbit Hole quilts that our group members created!

Courtesy of Penelope Washburn Hanberg: 


 Courtesy of Glenda Lewis:


Courtesy of Katherine LePiane:


Courtesy of Monika Zeller:


And here is our project, during construction:


Here is our finished quilt top:


Check out the video below on the finished quilt, just back from Monica Croom, one of our very talented Long Arm Quilters!


Aren't these all stunning? Thank you so much to our Facebook group members who shared pictures of their finished quilts! 
If you haven't joined our Facebook group yet, what are you waiting for? We'd love for you to join us and get the chance to ask Heidi all of your quilting questions, while getting exclusive tips and video content. 
All of the sew-along videos for this project are available to watch on YouTube so if you're feeling inspired to start now, you should! Or, join our on-going Dutch Wonderland sew-along. It's already a ton of fun and will only get more enjoyable with more participants. 
And finally, are you looking for a unique way to connect with your friends or guild? You can set up a private class or lecture with Heidi Pridemore to work through a project of your choice. Email heidi@thewhimsicalworkshop to set it up!

Tuesday, August 4, 2020

Block Mania Blog Hop_FREE Study Buddy Block


Welcome back to our blog, just in time for our free Back to School block! This week we've got another great addition to the Block Mania Blog Hop - the Study Buddy block.

If you aren't familiar with the Block Mania Blog Hop, it's a monthly hop that features a group of the quilting industry's top designers. We each create a FREE 12" block that fits the month's theme and color palette, and then you get to follow along and collect them all for yourself.
This month's theme is "Back to School" and our "Study Buddy" block pattern  and SVG File are available on our website.

So let's get started!


For this project, I used my Cricut maker to cut out the fabric for the applique shapes. If you don't have a Cricut, we do include the traditional instructions and templates in the downloadable pattern. However, if you're considering investing in a Cricut, we have an unboxing video on our YouTube channel.


Here are our fabrics laid out for this block. We used a combination of Basics from Benartex Fabrics, New Hues and Color Weave. Don't they compliment each other just perfectly? We think so! I love to mix basics in a project to add texture to the overall design. I recommend using Heat N Bond Featherlight for the fusible applique


Make sure to check out the Video Tutorial on how to make this block. We included lots of great tips on how to do the fusible applique, as well as some tips on using the Cricket Maker for cutting applique shapes.  If you are doing the applique the traditional method, make sure to check out our video on Fusible Applique.
=-

 Now that all of our pieces are cut and ready to assemble, it's time to move to the iron! Here is a shot of this adorable owl coming to life. I am using an Appli-fuse mat to make easy work of this. Did you know we now have these available on our website?  I recommend building the owl as one unit and the stacked books as a second unit on an appli-fuse sheet (applique pressing sheet) and then move the finished units to the pieced background. If you are interested in the the Appli-Fuse mat, check out my product review video here.

Now that we have our block assembled, it's time to pick our favorite Aurifil threads for the finishing stitch and move to the sewing machine. I recommend using 50 wt. or 40 wt. threads to for the edge stitches.  I matched the thread colors to the fabrics to keep the image soft. I did use a darker brown to outline the owl so the wings would pop out from the body. Make sure to check out our Buckets of Fun video posted last month for tips on how to do this stitch. 

Now our Study Buddy is ready you help you hit the books this fall!


We hope you have enjoyed following along with this month's free block. Make sure to visit our website, www.TheWhimsicalWorkshop.com for more whimsical patterns and subscribe to our YouTube channel for fun quilting tutorials.

PS Here are the links to last month's Buckets of Fun Free Block, SVG File, YouTube Video in case you missed it. You can check out the Blog post from July 7 for the complete list of designers who participated in that Blog Hop.


Here are the links to all the other fun back to school blocks on the Blog Hop. Make sure to stop by each to collect all your free blocks!