Welcome back to our blog! Today I'm going to walk you through how to do the Square in Square blocks made from bias triangles and the mitered borders that make up our beautiful Jubilation quilt pattern. These are great techniques to take with you when making other projects as well so I made a full video tutorial for YouTube that you can come back to and re-watch at any time.
For this project, I chose to start with the Silver Jubilee fabric collection from Maywood Studios. It's a really elegant collection of pretty blues, white and silver that celebrates Maywood Studio's 25th anniversary.
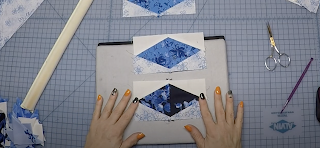
The block is built out with little square in a square units made with flip and sew, and diamond shapes. Because we've covered flip and sew before, this post is going to focus mainly on the bias triangles and diamond shapes.
You'll notice the diamond points are 1/4" away from the edge, and that's how they should be! You'll need four of these units per block, and our pattern calls for two different color ways, one color for the center block and the second for the surrounding blocks.
Now, let's move on to the center of the block which is made using bias triangles. The center is a square, which I fold in half in both directions and give it a good press. I fold each bias triangle in half to mark the center line as well. This gives us our center lines that we can use during assembly.
The first round is white triangles. I take the first white triangle and nest it into the center square, following that folded line to center the bias triangle on the square. Next, do the same thing for the opposite side and sew with 1/4" seam. Then, in order to not stretch the fabric, gently fold up the white triangles and press down using the edge of the iron into the seam. Next we can add on the remaining two white triangles using the center square's folded line for alignment. Press the triangles and square up the unit.
Next, we'll add on the remaining triangles and square up the finished unit. Then we can assemble the block using all three units that we've made!
To piece the half triangle blocks, start with a half of the center unit from the above step as directed in the pattern. The block is sewn in rows, so we'll start with a small triangle, diamond and square in a square for row one. Then sew a second diamond unit to the half center unit for row two. Sew rows one and two together, and finish with another small triangle at the top.
Following the pattern, match up the finished setting triangles with the main blocks to assemble the quilt top.


No comments:
Post a Comment