Saturday, May 30, 2020

How to Set Up Your Sewing Area for Quilting


Hi there and welcome back to The Whimsical Workshop blog! If you've been following along with us the past few weeks, you'll know that we walked through all of my favorite tips on how to set up your ironing and pressing area for quilting. If you haven't had a chance to read those tips yet, I recommend going back and starting there.
Because now we're moving on to your sewing area! When setting up an area for quilting, there are several things to keep in mind.

To begin, you really need to consider the type of surface you're going to put your sewing machine on. Do you have enough space in your sewing area for a cabinet dedicated to holding your machine? Or will you need to use a table and store your machine between uses? If you do need to break down your area between uses, it's really important to make your break down and set up process as simple as possible. If getting out your machine and setting it up takes a long time or gets too complicated, you won't be encouraged to sew. 


For either set-up you'll need to make sure to leave yourself enough space around the machine to support the quilt project as it grows. If you leave the fabric hanging off the table while sewing, it can cause the fabric to stretch and distort while you are sewing, which can then lead to ripples in your project. If you have a narrow table consider using a small table or adjustable ironing board on the side or in back of your machine table for added space and support.


Another thing to consider is where you'll put your sewing tools. I love having drawers in my cabinet to store my notions and add fun cups on top of the table for tools I use the most.  My favorite tip is on storing your sewing machine feet; I use an inexpensive bait box from a sporting goods store to keep my the feet organized and protected from damage that can occur from just throwing them loose in a box. 

I love this style of bait box because the lid pops off and can be stored under the box while it sits my drawer. When I have to go on the road, I just pull out the box and pop the lid on and we're ready to go!


The next step, similar to how I set up my pressing station, is to ensure that your sewing table and chair are at the correct height. If you're too high or too low for your station it may cause neck, back and arm pain. If you need to raise up your foot pedal, try Yoga Blocks! I also recommend an adjustable chair, such as those used in offices, so that you can raise and lower yourself as needed. You can also add a splash of color by adding a quilt to the chair.


And finally, good lighting is crucial. The light should properly illuminate not just your machine, but the area around your machine. This will make it easier to catch mistakes, adjust your sewing machine foot, trim excess thread, and much more. I use three lights at my machine along with the light on the machine. I have a Daylight Slim Light in front of the machine, a goose neck light pointed at the needle and a LED light under the arm of the machine that lights up the work surface.  I've listed out some of my favorite lighting sources below with links as to where you can find them. 

Visit our YouTube channel to see how I set up my sewing area, as well as how I store my sewing machine feet and details on some of my favorite notions. 

Next week I'll be going over my top 5 recommended sewing machine feet, so be sure to come back and keep following along!


Shop The Whimsical Workshop Notions an More

Lighting Links

Saturday, May 23, 2020

Ironing Station for Quilting - Pressing Mats, Lighting and a Bonus Tip!


Hello there! It's Heidi from The Whimsical Workshop, here to help you finish setting up you ironing and pressing area so that you can get started on all of your wonderful quilting projects.

Now that we've talked about what to look for in a good iron and how to make sure your surface is at the right height (if you haven't read these blogs yet, I recommend starting there!), we can move on to the next step, your pressing surface.


Having the right surface to press on is very important as it can impact how long it takes you to iron your fabric. My preferred surface to use is a large wool pressing mat from The Gypsy Quilter. Wool is an insulating fiber, which means that it can help absorb more moisture at a faster rate. In some cases, this can help significantly cut down the amount of time you spend pressing.

However if wool isn't your style, a 100% cotton cover makes for an excellent choice as well. Cotton is a good choice for delicate fabrics that require a lot of pressing, but can't withstand too much heat.


The next step in setting up your pressing area is to make sure that you have adequate lighting. Lighting is crucial in all stages of quilting, but especially with pressing. Without good light, it's harder to see whether you're pressing seams fully flat, if you're spraying enough water out of your spray bottle, you know, those kinds of important things!

To start, take into account whether you do most of your work during the day, or at night. If you tend to quilt mostly during the day, then being by a window with lots of natural light would be optimal. If you sew a lot in the evenings after the sun sets, or if you are in a space without windows, then investing in a good overhead lamp might be a good idea.


And finally, now that our stations are set up in a well-lit area, covered in a wool pressing mat, sitting at just the right height, a bonus tip from me to you.


I have had years to get every part of my pressing station set up to exactly how I like it. And the one thing I would absolutely recommend to all quilters for this area, is a gel floor mat. If you're anything like me, you'll be spending many long hours on your feet, pressing away. Having a comfortable, supportive mat will go a long way in helping relieve foot and back pain.

Check out our video on YouTube where Heidi takes you on a tour of her pressing area at The Whimsical Workshop Studio.

Thank you for following along and if you have any questions, you can always reach us at info@thewhimsicalworkshop.com.


Saturday, May 16, 2020

Ironing Station for Quilting-Ironing Board Size & Height

Hi there, it's Heidi from The Whimsical Workshop! I'm back to talk more about your pressing station for quilting and how to get your ironing board set up properly.

First consider if you will be keeping the ironing area up permanently or if you have to take it down after each use. If you are going to use it permanently, consider using cabinets with an ironing top instead of the traditional ironing board. This will give you extra storage and can be customized to your desired height.

You will be spending a lot of time at your pressing station so it's important to make sure it works for your body. If it's too short and you're bent over, it could lead to back pain. Too tall and you're in for shoulder and neck pain.

You will need a surface to press on.  First consider the size of the pressing area. I use a big board for my ironing surface since the rectangle size works best for quilting. If you do not have the space a regular ironing board works too.


 You will be standing at the ironing board for long periods of time so consider getting a gel mat to stand on. It can make the time spent at the ironing board easier on you feet, legs and back. These can be found in most kitchen supply departments or here is a link to one on Amazon.

Make sure you have excellent lighting at your pressing area. I use a Daylight Slimlight at the ironing board. The powerful LED lights make it much easier to press darker fabrics or smaller pieces. I love these lights so much that we have them all over the studio!


Next you need to decide on the your pressing surface. I love the newer wool mats for pressing. When you press on a wool pressing mat, the wool holds the heat and then radiates it back up through your seams. This creates flat blocks quickly and easily. My favorite one is the from The Gypsy Quilter and is available in multiple sizes. I recommend Wool Pressing Mat 21-5/8in Wide x 58-5/8in Long x 3/8in Thick from The Gypsy Quilter to cover your entire pressing area. If you travel and quilt, I also recommend the Wool Pressing Mat 14-1/3in Wide x 18-7/8in Long x 1/2in Thick from The Gypsy Quilter
This one fits on a standard tray table.


For more tips on setting up your ironing area, make sure to check out our video on YouTube here.

While you are there, be sure to subscribe to our YouTube channel "The Whimsical Workshop" so that you can stay up to date on all of our latest news and be the first to see new videos.


You can also find us on Pinterest, Instagram and Facebook
If you haven't joined our new Facebook group, Heidi's Quilting Help Desk, what are you waiting for? We've started a Sew-a-Long and answer all sorts of fun quilting and sewing questions.

We earn a commission for products purchased through some links in this article


Saturday, May 9, 2020

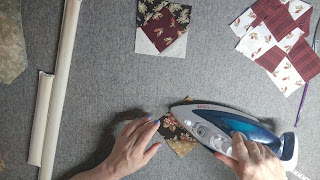
How to Set Up Your Pressing Area for Quilting


Hi there! It’s Heidi again, here to share with you some tips on how to set up and maximize your pressing area for quilting.

Pressing is an important step in the quilting process as it helps you assemble pieces more easily and gives your overall finished project a more polished and refined look. In larger or more advanced projects you may find yourself needing to press a lot of seams or appliques, so having an area dedicated to pressing will help you work much more efficiently.


The first step is to make sure you have a good iron. While this may seem obvious to point out, a better iron will make your projects much easier to complete. But what qualifies as a “good iron”?

When looking for the right iron, it’s important to check that it’s a good weight for you. You don’t want it to be so heavy that your arm is sore after using it, or so light that you find yourself pressing down too hard. If you can’t test out the weight of an iron in person, just be sure to look at the weight before buying one online.

An iron with a ceramic or Teflon plate will also be easier to clean, which will help keep it in good shape for longer. Looking for tips on how to keep your iron clean? We have a video on YouTube that covers the best ways to clean your iron.

And finally, price. You shouldn’t go out of your budget to purchase an iron. I have had high end irons and inexpensive irons and they both seem to last about the same time. So don't let the price drive your choice.

Quick Tip: I avoid using water in the iron in order to prolong its life. Consider using a spray bottle instead!

The next step in setting up your ironing area is to make sure that the height of your ironing board works for you. We all know that ironing boards can take up a lot of space, but rather than going for a smaller ironing board that will cause you discomfort to use, check out the solution in our video on how to maximize the space under your ironing board so that you can keep one out at the right height.


For your pressing surface, personally I prefer to use wool pressing mats. If wool isn’t for you, I would recommend a 100% cotton cover as next best.

And finally, lighting. As with all other areas in your sewing room, good lighting is essential when it comes to ironing. If you quilt mostly during the day, try positioning your iron near a window. Or if you tend to be more productive in the evening, ensuring you have adequate lighting in your sewing room area is crucial.

Bonus Tip: You’ll be standing at your ironing station a lot. Invest in a gel floor mat to help soothe your feet and legs during those long pressing sessions!

Make sure to check out our video on YouTube for more tips on setting up your Pressing Area for Quilting here, How to set up a pressing area for quilting

Now that your pressing area is all set up and ready to go, there are a couple of tools that I like to keep with my ironing board. A lot of these tools can also be used in different areas, but having them within reach of your pressing station will save you time.

I’ve listed out links to where you can find all of these tools below, as well as gone over each of them in this video on our YouTube channel:


Below are links to some of my must-haves at my own pressing station:

1.     The Whimsical Workshop Notions

2.     Daylight Light
       https://amzn.to/2AesqlL


3.     Rowenta Travel Iron


4.     T-Fal Ultra Glide Iron

5.     Big Board-Sullivans Board Overlay
       https://amzn.to/2YPqydw

6.     Large Wool Mat

7.     Mary’s Best Press

8.     Spray Bottle

9.     Magnetic Pin Cushion
https://amzn.to/2yFxGOI

We earn a commission for products purchased through some links in this article.

Friday, May 1, 2020

Best Cutting Tools and Tips for Fabric and Quilting PART II


Rotary Cutting Basics for Quilting-PART II

Hi! It's Heidi from the Whimsical Workshop, here to discuss some rotary cutting basics with you!

Have you ever asked yourself “how do I cut fabric accurately?”. The answer is practice, and using the correct tools. 

With quilting specifically, those tools include a sharp rotary cutter, an acrylic ruler and a self-healing cutting mat.  

If you have questions about which rotary cutter to get or how to keep them maintained, there are videos on our YouTube page here which cover everything you could ever want to know about them. 

For now, let's take a closer look at acrylic rulers and self healing cutting mats:


Acrylic Rulers -

There are so many sizes of quilting rulers out there, that as a beginner it can definitely be overwhelming to figure out which ones you need versus which are just nice to have. 

As a self-proclaimed ruler junkie it's hard to narrow it down to only a handful of ruler sizes that I think every quilter should have. But over the past few weeks I've taken a closer look at which rulers I find myself reaching for most often in my studio. This helped me create a list of the three sizes I think will be most helpful for you. 

The first ruler size I recommend for every quilter, is a 24" long ruler. They come in different widths, with 6-1/2" being the most common. However a few years ago I purchased an 8-1/2" x 24" ruler from Creative Grids and it has become a workhorse ruler in our studio.   

A 24" ruler makes quilting fabric in just two layers so much easier. Quilting fabric measures 42" wide and ships to stores folded and rolled on a bolt. When we ultimately purchase quilting fabric in a store, it's sold to us folded and about 21" long. A 24" ruler therefore works perfectly to cut the fabric without having to fold it a second time.

The next ruler size I'd recommend is a larger square ruler, such as a 12-1/2" x 12-1/2" or 16-1/2" x 16 1/2". These are perfect to help square up blocks before sewing them into a quilt top. They also work great to cut larger pieces of fabric.

The final size ruler that I believe every quilter needs is a 6-1/2" x 6-1/2" square ruler. This size is perfect to square up smaller blocks or pieces. I often use this size to cut smaller squares and triangles. 

I have uploaded a video to YouTube talking more about these ruler sizes as well as my favorite brands and some great tips on cutting fabric accurately. Make sure to check it out here, 
"Top Three acrylic ruler sizes that are perfect for quilting"


Cutting Mats -
The last essential tool I'd recommend for easy cutting is a well-made cutting mat. When it comes time to buy a cutting mat, you'll need to know which size is best for you as well as which brands are the best for rotary cutting for quilting.

The most popular cutting mat for quilters measures 18" x 24" and works best with the 24" ruler we discussed above. Most quilters need this size when starting out. 

If you are lucky enough to have a cutting table just for quilting I would recommend buying a mat that will cover the whole table. It's amazing just how much of your table surface you'll use if the entire top is covered and protected.

It's important to note that not all cutting mats are created equal. A bad cutting mat will make it harder to cut fabrics and will wear out your blade faster. In my 20 years of quilting, I have experienced my fair share of both good and bad cutting mats. I have covered my favorite brands and sizes in our video "How to pick the best cutting mat for quilting", available now on YouTube. 

I have included links for my favorite rulers and cutting mats below.

Now that you have the right tools for cutting, I want to share a few quick tips with you on cutting accurately. You can also follow along with our "Basic Tips on Cutting" video on YouTube. 

Basic Cutting Tips - 

Align the selvedge edges on each piece before cutting to keep your strips straight.

Always press the fabric first to get rid of any wrinkles.

Make sure the your Rotary Blade is sharp. This will help with accuracy and makes the task easier.


Here are the links to products we discussed above:

Rotary Cutters


Rulers


Cutting Mat Links


We earn a commission for products purchased through some links in this article.